Spring is the perfect time to start raising backyard chickens! Not only do they provide fresh, nutrient-dense eggs, but they are also fun, full of personality, and make great additions to any home. Whether you’re just getting started or looking to refine your chicken-keeping practices, this guide will walk you through what you need to know as your flock grows.
Bringing Chicks Home: Setting Up a Safe Brooder
If you’re starting with baby chicks, creating a safe and comfortable brooder is essential.
- Ditch the heat lamp – Traditional heat lamps pose a serious fire risk. Instead, use a heat plate brooder, which is safer and mimics a mother hen’s warmth. (Here’s the one I use.)
- Temperature Control – The brooder area should be kept at room temperature (around 70°F). It is important to have a space available away from the heat plate for them to have an area to cool down if they get warm. Chicks will go under the heat plate when cold and come out when they are warm.
- Food and Water Placement – Keep their food and water on the opposite side of the brooder from the heat plate to encourage movement and prevent overheating. (Here are the ones I use).
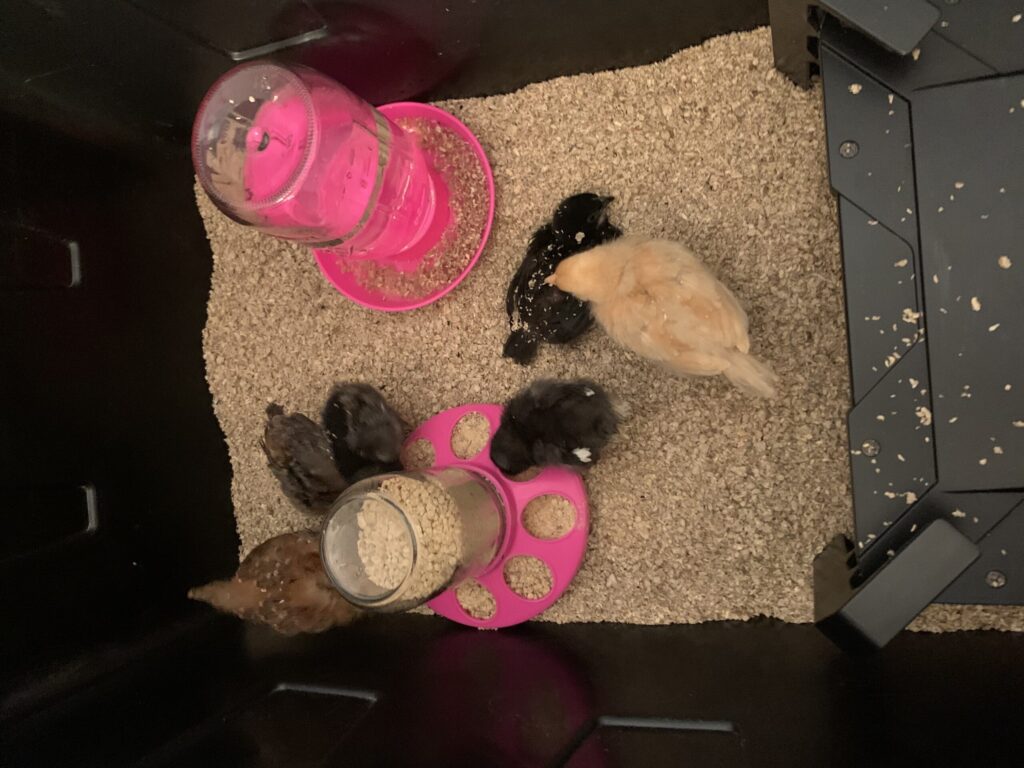
Here is a picture of my first chicks. As you can see, the waterer I started with ended up with a lot of bedding in it and had to be changed constantly. It worked just fine, but was more work. We ended up putting it up on bricks. That is why I recommend the one with little legs listed above to keep it up. You just want to be sure your chicks are able to get to it.
Chicks Love to Play!
Chickens are naturally curious and playful. Giving them toys keeps them engaged and active. Here are some great options:
- Mirrors and small perches – Helps chicks explore and interact.
- Mini roosting bars – Encourages balancing and perching skills. (Here is the one I use.)
- Hanging treat balls – Keeps them busy and stimulated.
Once they move to the coop, they’ll enjoy chicken swings, treat dispensers, and dust baths. Here are my favorite chick and hen toys.
Fermenting Chicken Feed for Better Health
Fermenting your chickens’ food can boost hydration, improve digestion, and enhance their immunity. I offer one jar of fermented food each day and unlimited dry food in their feeder. I have tried many different feeders and waterers and these are the ones that I found to be my favorite.
How to ferment their food:
- Fill a glass mason jar 1/3 full with chicken feed.
- Add water until it reaches the curved part of the jar, then stir.
- Place the lid on top, but don’t tighten it—this allows gases to escape.
- Stir once per day.
- After 3 days, it’s ready! It should have a mild, yogurt-like smell. If it smells rotten, it’s gone bad and should be discarded. It is a very distinct smell when it has gone bad and you will know it.
Introducing Scraps: What Can Chickens Eat?
Chickens love to dig and scratch for bugs, which helps supplement their diet and reduce feed consumption. You can also give them vegetable scraps from cooking as a nutritious treat. It is important to make sure this is not replacing their food as they still need to be getting protein!
Safe fruits and vegetables:
- Leafy greens: Kale, chard, spinach, lettuce
- Root vegetables: Carrots, beets
- Other veggies: Broccoli, celery, cauliflower, eggplant, tomatoes, peas, corn
- Fruits: Berries, apples, melons, banana
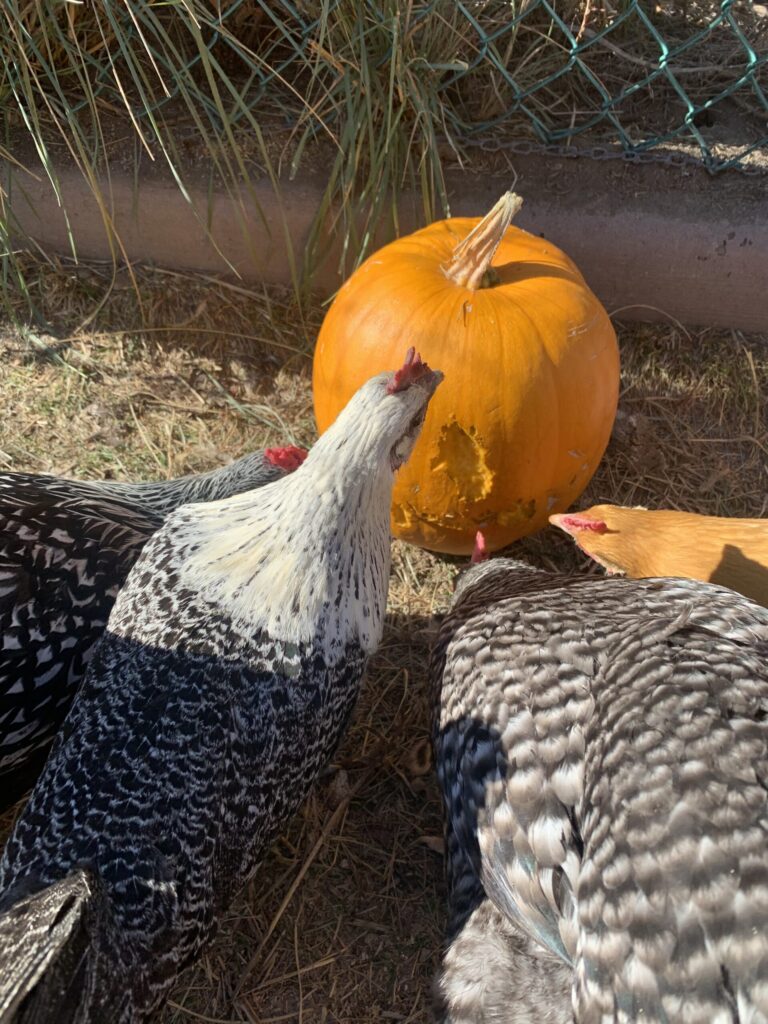
- Cooked: Brussels sprouts, beans, squash (they even carve pumpkins!)
- Raw or cooked: squash and pumpkins
Avoid feeding:
- Raw or green potatoes
- Avocados
- Uncooked beans
- Uncooked Brussels sprouts
- Garlic & onions
- Rhubarb leaves
- Nightshade leaves (from tomatoes, peppers, potatoes)
- Citrus fruits
You will find that many people will feed their chickens all leftover foods including things like breads and pastas, but I try to stick with what would be found in nature.
Molting: What to Expect
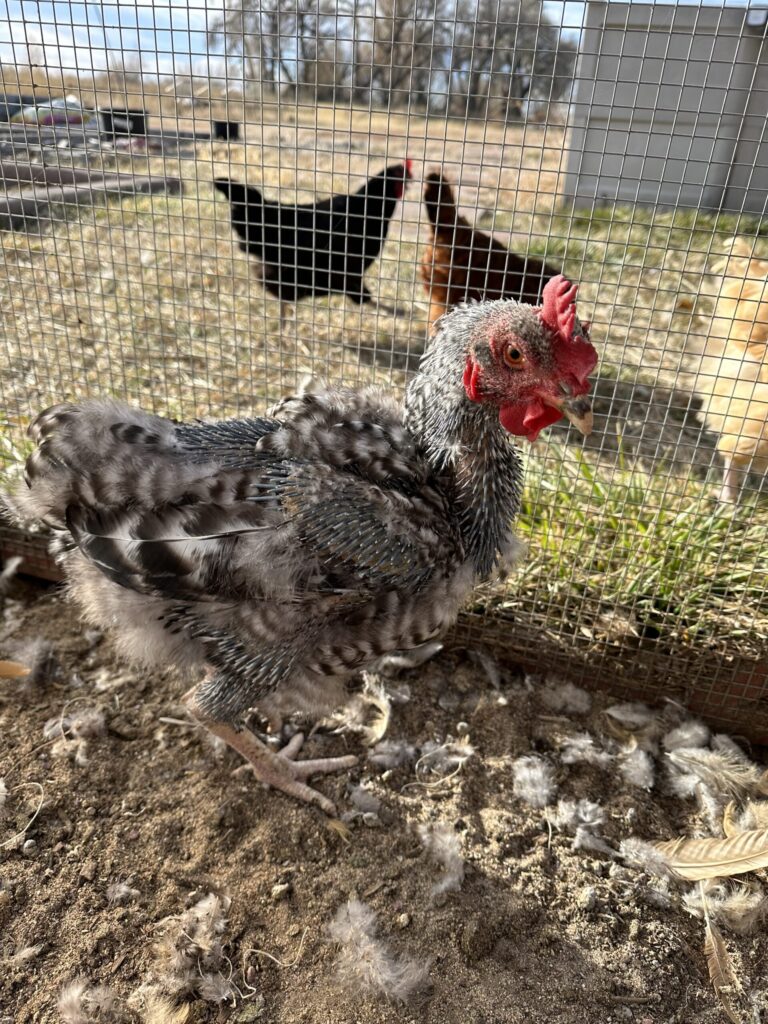
- Molting is when chickens shed old feathers and grow new ones. This typically happens in late summer to early fall. The first time I saw mine molt, I panicked—there were feathers everywhere, and one of my hens looked completely naked!
- Protein is crucial – Providing extra protein helps support feather regrowth. Mealworms are a great source (here’s the kind I use). I have found buying them in bulk saves money per ounce.
- Other protein sources: Scrambled or hard-boiled eggs (don’t worry, this isn’t cannibalism—chicks develop by consuming these nutrients inside the egg!).
- Handle with care – Their pin feathers are painful, so avoid picking them up unless necessary.
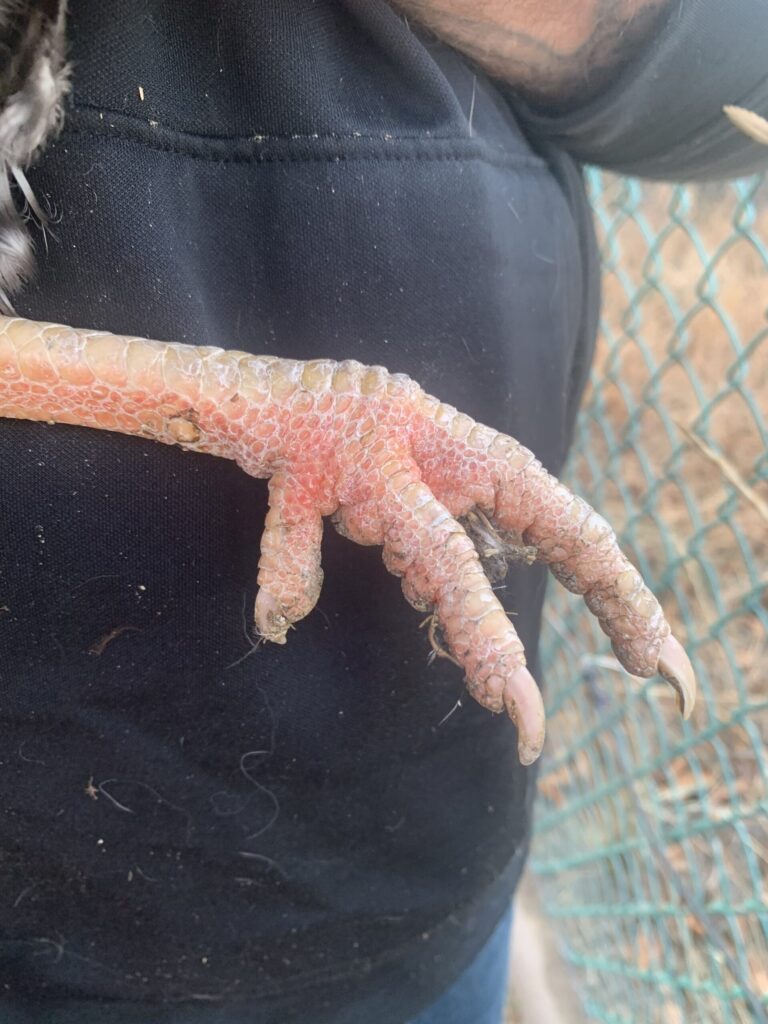
- Hormonal changes – Their legs may appear more red due to shifts in hormones.
(Here are pictures of my molting chicken and her red legs.)
Protecting Your Flock from Predators
Predators can be a major threat to backyard chickens, especially at night. Here are some key strategies to keep them safe:
- Secure the coop – Use 1/2-inch hardware cloth instead of chicken wire. Chicken wire keeps chickens in, but doesn’t keep predators out! This can be purchased at your local hardware store or purchase here.
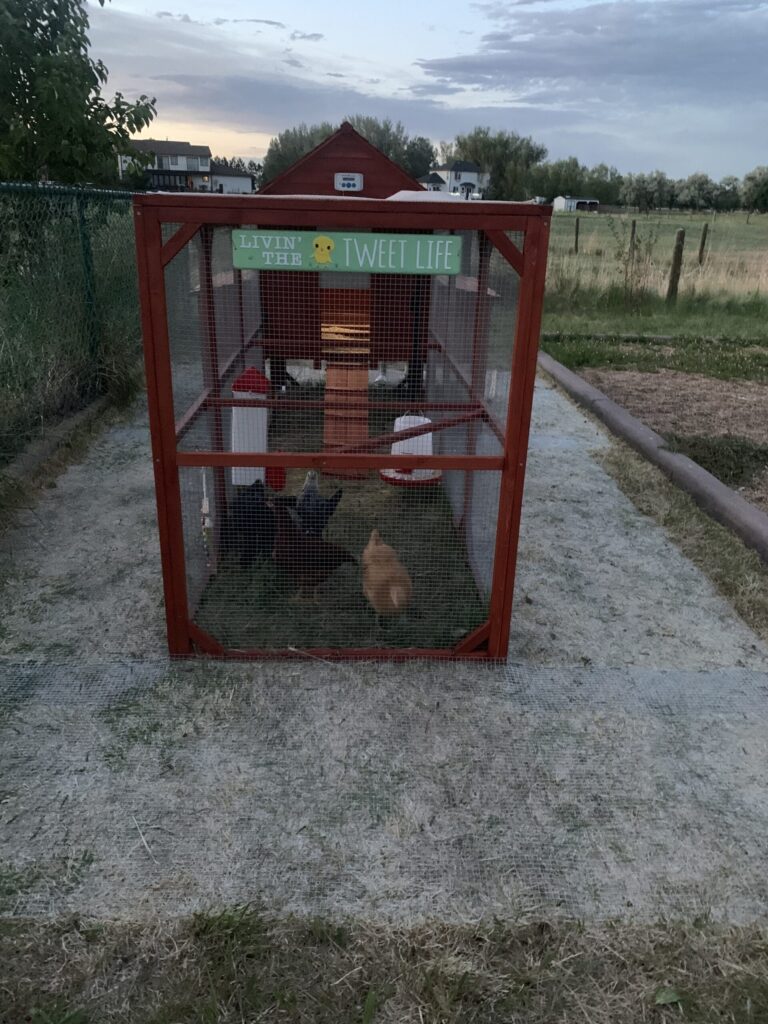
- Bury fencing – Dig fencing or hardware cloth 6-12 inches deep around the coop and run to prevent predators from digging underneath. Another option is to lay hardware cloth down on top of the ground extending a few feet out surrounding the coop and secure with landscape staples. That is what we did to our coop and predators cannot dig under and the grass does start to grow back through it, so you don’t see it during the summer. See picture below. *You do not want hardware cloth down on the ground inside your coop or it will hurt your chickens feet.
- Lock them up at night – Always close the coop door when the sun sets and open at sunrise. An automatic coop door can help if you’re not always home at dawn or dusk. Here is the one I use.
- Add motion sensor lights – Many nocturnal predators, like raccoons and foxes, avoid well-lit areas. I got mine at Home Depot.
Chickens Start Laying at 4-6 Months
As they mature, your hens will begin laying eggs around 4-6 months old. However, egg production slows down in the winter.
Chickens do not chew their food, so they will eat tiny stones and should be provided with grit to assist with grinding up the food in their gizzards. To support digestion, provide chick grit once they start eating bugs and scraps. It is not necessary if they are only eating chick starter.
- Oyster shells – Once they start laying, you can introduce oyster shells for added calcium, ensuring strong eggshells. If eggshells are soft, supplementing with calcium can help. You can purchase those here.
- Free-range chickens often find their own grit – A bag of adult grit can last over a year depending on how many chickens you have.
Health Benefits of Pasture-Raised Eggs
Not only are chickens fun to raise (each one has their own quirky personality!), but they also provide a steady source of nutrient-dense eggs that are far superior to store-bought.
Compared to eggs from caged hens, pastured eggs have:
- 38% higher vitamin A concentration – Supporting eye health and immune function.
- Twice as much vitamin E – A powerful antioxidant that helps protect cells from damage.
- 2.5 times more Omega-3 fatty acids – Essential for brain health and reducing inflammation.
- Twice as much long-chain Omega-3 fats – Providing even greater cardiovascular benefits.
Because your hens are free to forage for bugs, grass, and natural food sources, their eggs are richer in nutrients and bursting with flavor. Plus, many cities—even those that aren’t rural—allow a limited number of hens in backyards, making it easier than ever to start your own small flock!
Understanding Broodiness
Around one year old, some hens may become broody, meaning they want to sit on eggs to hatch them—even if the eggs aren’t fertilized!
How to break broodiness: The best method I’ve found is to separate them for a couple of days in a dog kennel or cage without bedding. I use an old rabbit cage for 2 days, then return them to the coop.
Don’t separate them too long – More than 2-3 days can disrupt the pecking order.
Gentle methods only – Some social media advice includes cruel methods, which I do not support.
The reason it is important to break them of this habit is because even if it is 105 degrees outside and you have removed the eggs from underneath them, they will stay sitting on their “nest”. This can lead to dehydration as they do not take frequent meal or water breaks. They also stop laying during this time.
How Long Do Eggs Last?
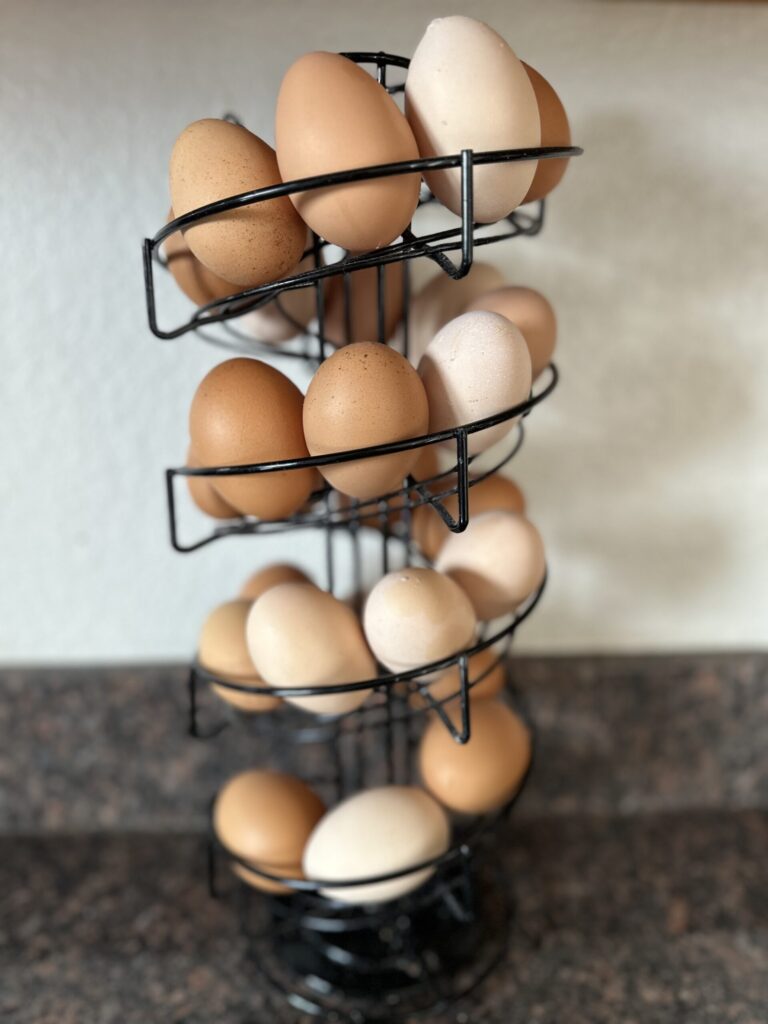
Eggs that are not washed can last on the counter for at least 2 weeks. (Here’s my favorite egg holder.)
- Unwashed eggs in the fridge – Can last 3 months or more.
- Washed eggs – Should be refrigerated and used within a few weeks.
Washing eggs removes the protective bloom that helps preserve freshness, so it’s best to wait until just before use to wash them.
Do You Need a Rooster for Eggs?
A common misconception is that you need a rooster for hens to lay eggs. Not true! Hens will lay eggs whether or not they have been around a rooster. A rooster is only needed for fertilized eggs.
Dust Bathing: Chicken’s Natural Spa Treatment
Chickens don’t bathe in water like we do—they take dust baths to keep their feathers clean, control parasites, and even socialize. If your chickens free-range, they will naturally find a dry patch of dirt to bathe in. If not, you can create one for them using a high-sided litter box filled with a mix of wood ash and dirt.
A good dust bath helps remove excess oils, mites, and other pests while keeping their feathers in top condition. It also doubles as a fun activity for them! This high-sided litter box can be used to keep everything contained and prevent too much mess.
Raising backyard chickens can be such a rewarding experience. They provide nutritious eggs, natural pest control, and endless entertainment. If you’re just starting or have questions about chicken keeping, send me a message—I’d love to help!
Want to learn more about what I do? Click here to learn more about me.
*As an Amazon Associate I earn from qualifying purchases. Not all links are affiliate links.


